Install Netclient on OpenWrt
This guide covers how to install and integrate the Netmaker Netclient on an OpenWrt router so it joins your Netmaker VPN network and can route traffic between the VPN and your local LAN.
This guide implements the concept introduced in Chapter 2 -- Remote Access.
What You'll Learn
- How to install WireGuard on OpenWrt as a prerequisite for Netclient
- How to install and run Netclient on an OpenWrt device (any supported architecture)
- How to register the VPN interface and configure firewall zones in LuCI
- How to set up egress routing so VPN nodes can reach your LAN
Prerequisites
- An OpenWrt device (x86_64, ARM64, ARMv7, or MIPS -- see the architecture table in Step 2)
- A Netmaker server already deployed and reachable (see Install Netmaker on a VPS)
- SSH access to the OpenWrt device
- A network already created on your Netmaker server
Used Versions
| Software | Version |
|---|---|
| OpenWrt | 25.10.x |
| Netmaker | v1.5.0 (Community Edition) |
| Netclient | v1.5.0 |
Step-by-Step Implementation
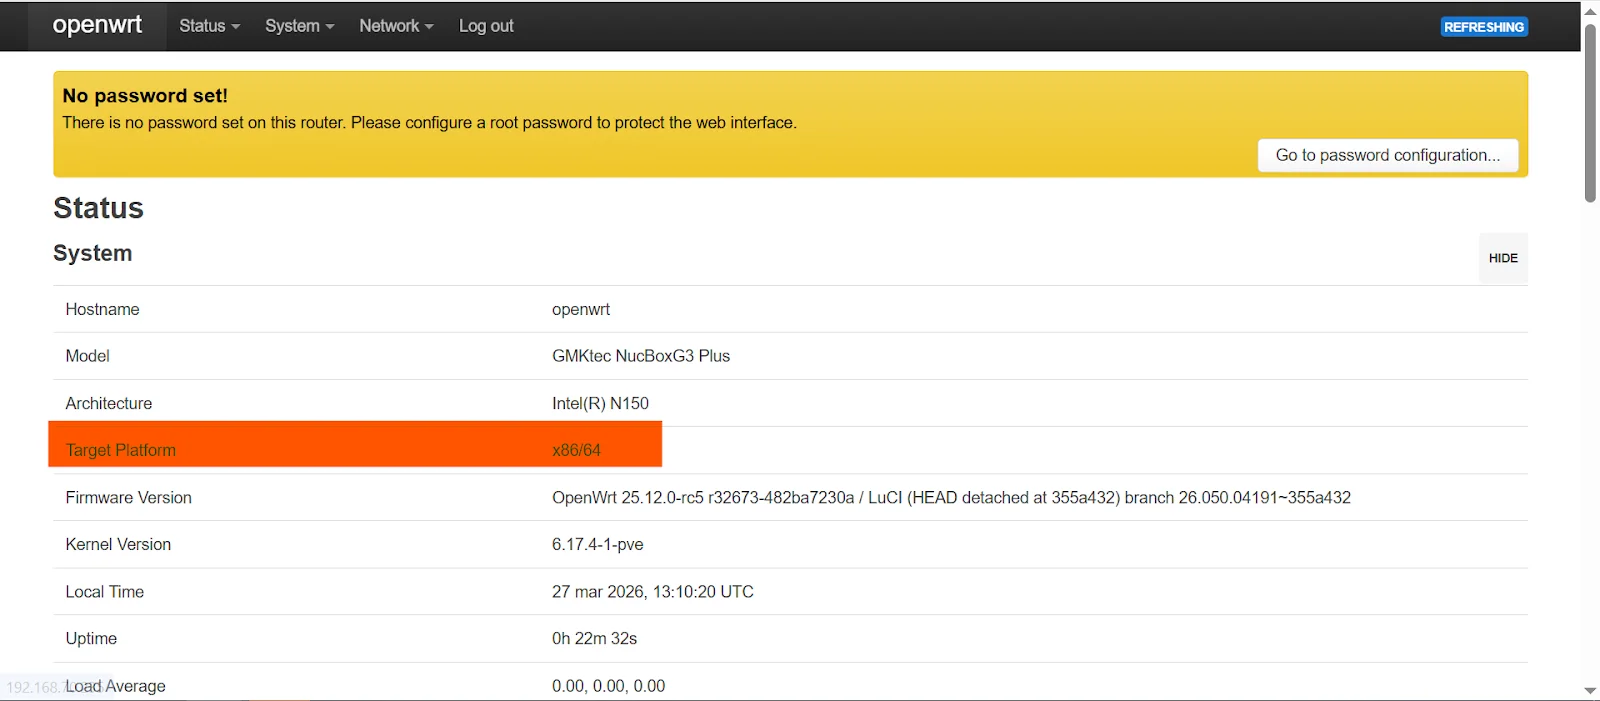
0. Identify your OpenWrt version and architecture
- Open the OpenWrt LuCI web interface.
- Go to Status --> Overview and note the Architecture field (e.g.,
x86_64,aarch64,arm,mipsel) and the Firmware Version. You will need the architecture in Step 2 to download the correct Netclient binary.
Alternatively, from SSH:
1. Install WireGuard
- SSH into your OpenWrt device.
-
Update the package index and install the required WireGuard packages:
-
Reboot the device to load the WireGuard kernel module:
Older OpenWrt versions (before 25.x)
If your device runs OpenWrt 24.x or earlier, use opkg instead of apk:
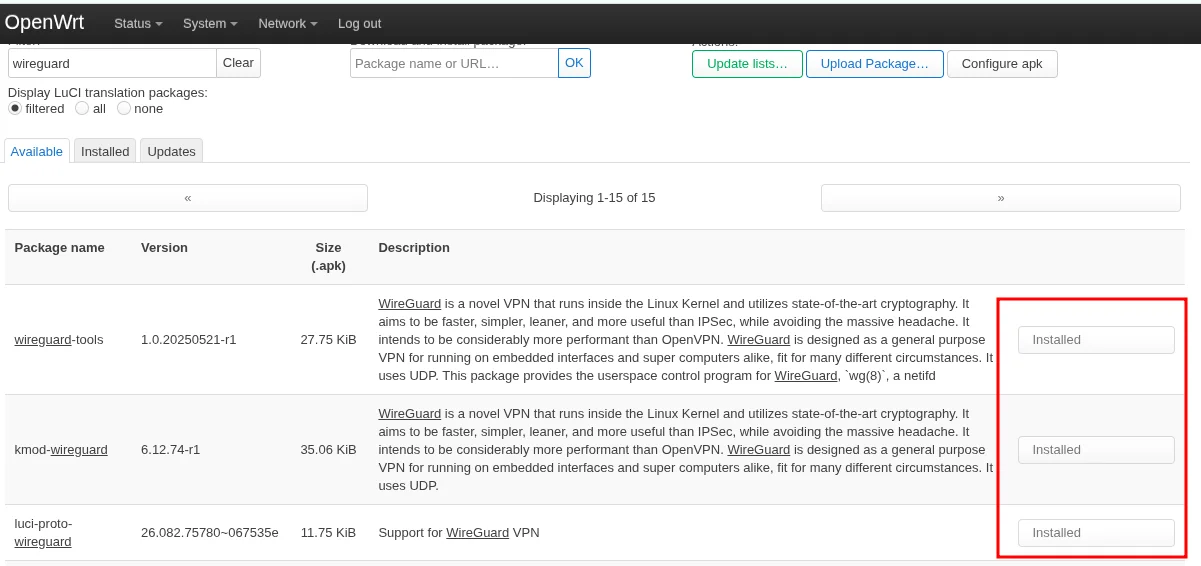
Alternatively, you can install WireGuard from the LuCI web interface:
2. Install Netclient
- SSH into the OpenWrt device (after reboot).
-
Find the correct binary name for your architecture:
OpenWrt Architecture ( uname -m)Netclient binary x86_64netclient-linux-amd64aarch64netclient-linux-arm64armv7lnetclient-linux-armv7mipsnetclient-linux-mipsmipselnetclient-linux-mipsle -
Download and install Netclient, replacing the binary name if needed. Example for x86_64:
wget -O netclient https://downloads.netmaker.io/releases/download/v1.5.0/netclient-linux-amd64 && chmod +x ./netclient && ./netclient installFor ARM64 (e.g., Raspberry Pi 4, modern ARM routers):
Version compatibility
Netclient versions 1.2.0 and 1.4.0 cannot be installed directly on OpenWrt.
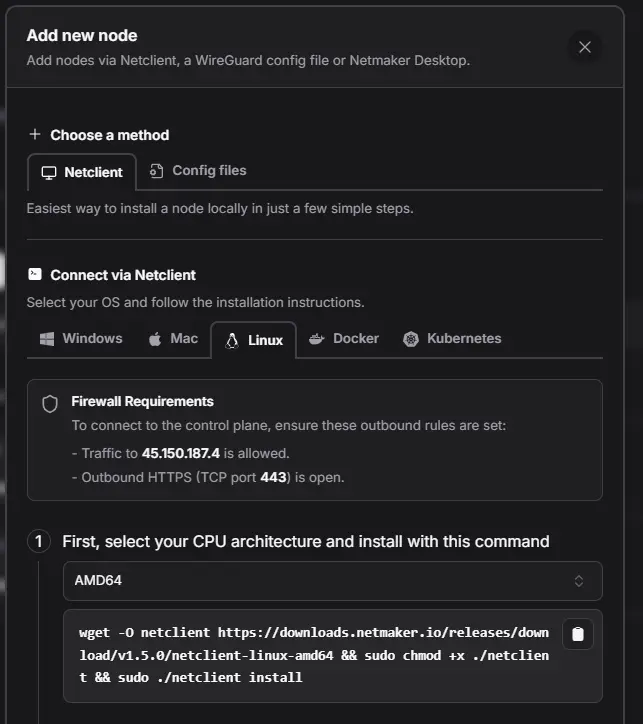
Where to find the install command
The install command is also shown in the Netmaker dashboard under Nodes --> Add Devices. Select the Netclient tab, choose Linux, and pick your CPU architecture. Remember to remove sudo since OpenWrt runs as root by default.
3. Join your Netmaker network
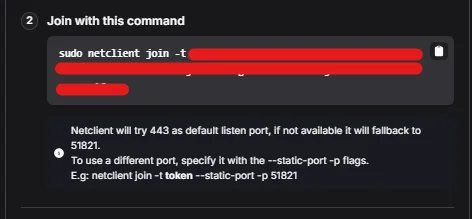
- In the Netmaker dashboard, go to Nodes --> Add Devices.
- Copy the join token shown in step 2 of the dialog.
-
On the OpenWrt device, run the join command replacing
<TOKEN>with your actual token: -
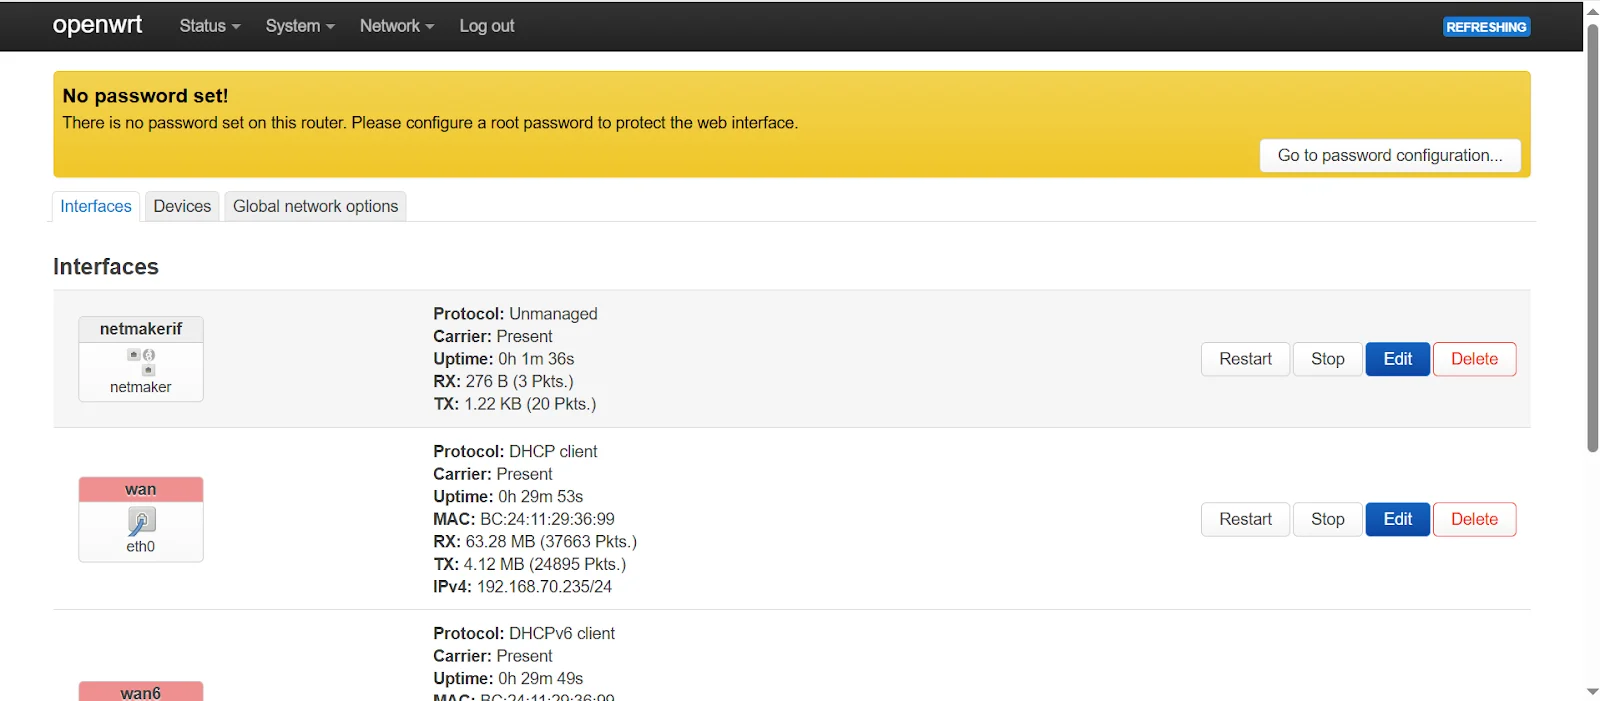
Verify the WireGuard interface was created:
If successful, a new WireGuard interface (usually
nm-*ornetmaker) will appear.
4. Enable auto-start on boot
-
Create a procd init script so Netclient starts automatically:
-
Make it executable and enable it:
What is procd?
procd is OpenWrt's process management daemon -- the equivalent of systemd on standard Linux distributions, but lighter and designed for embedded devices. The respawn parameter ensures the daemon restarts automatically if it crashes.
5. Register the WireGuard interface in LuCI
- Open the LuCI web interface.
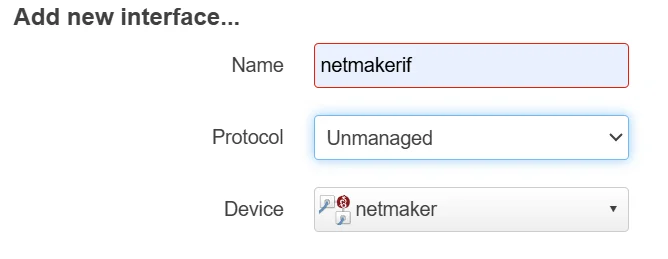
- Navigate to Network --> Interfaces --> Add new interface.
-
Fill in the fields:
- Name:
netmakerif(or any name you prefer) - Protocol:
Unmanaged - Device: select the interface created by Netclient (
netmaker,nm-*, etc.)
- Name:
-
Click Create Interface.
- Click Save & Apply.
6. Create a firewall zone for Netmaker
- Navigate to Network --> Firewall --> Zones.
-
Click Add to create a new zone with these settings:
Field Value Name netmakerznInput ACCEPT Output ACCEPT Forward ACCEPT Masquerading ON MSS Clamping ON Covered Networks netmakerif -
Configure inter-zone forwarding:
- Allow forward to destination zones:
LAN - Allow forward from source zones:
LAN
- Allow forward to destination zones:
-
Click Save & Apply.

Forwarding rules by use case
| If you want... | Forwarding rules |
|---|---|
| Only the router itself to use Netmaker | No extra changes needed |
| LAN devices to use the VPN (site-to-site) | Allow LAN --> netmakerzn and netmakerzn --> LAN |
| Router to act as a VPN exit node | Allow netmakerzn --> WAN |
7. Set up remote access port forwarding
Only needed if other VPN nodes must reach your LAN through this router from the internet.
- Navigate to Network --> Firewall --> Port Forwards.
-
Click Add and configure:
Setting Value Name netmaker-remote-accessProtocol UDP/TCP Source Zone WAN External Port 51821(or the port shown in Netmaker UI)Destination Zone netmakerznInternal IP The Netmaker VPN IP of this OpenWrt node Internal Port Same port (e.g., 51821) -
Click Save & Apply.
8. Add an egress route in Netmaker
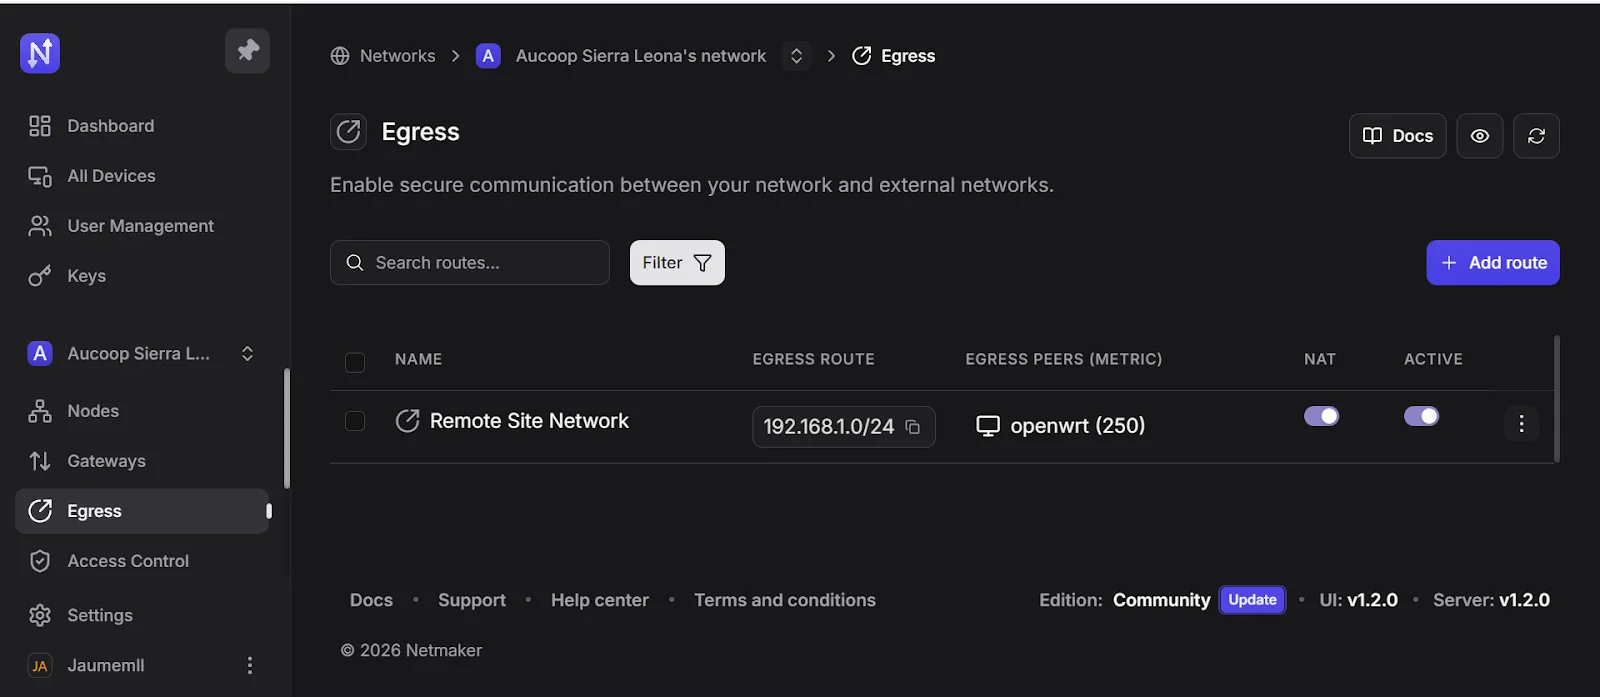
- Open the Netmaker dashboard.
- Go to the Egress menu in your network.
- Click Add Route.
- Set the destination address to your LAN subnet (e.g.,
192.168.1.0/24). - Select the OpenWrt node as the gateway.
- Enable NAT.
- Save the changes and apply the configuration.
Tip
Reboot the OpenWrt device after completing all the configuration steps to ensure all interfaces and routes are loaded correctly.
References
- Netmaker OpenWrt integration guide -- https://help.netmaker.io/en/articles/9773942-making-openwrt-successfully-integrate-with-the-netmaker-network
- Netmaker Netclient on OpenWrt how-to -- https://learn.netmaker.io/how-to-guides/how-to-run-netclient-on-openwrt
Revision History
| Date | Version | Changes | Author | Contributors |
|---|---|---|---|---|
| 2026-03-31 | 1.0 | Initial guide creation | Jaime Motje | Maria Jover, Sergio Gimenez |