Add a Device via WireGuard Config File
This guide covers how to add any device to your Netmaker VPN network by generating a WireGuard configuration file from the Netmaker dashboard and importing it on the client device.
This guide implements the concept introduced in Chapter 2 -- Remote Access.
What You'll Learn
- How to generate a WireGuard config file from the Netmaker dashboard
- How to import the config on Linux, Windows, macOS, or mobile devices
- How to verify the VPN tunnel is working
Prerequisites
- A Netmaker server already deployed with at least one network created (see Install Netmaker on a VPS)
- A Netclient agent installed on at least one OpenWrt router (see Install Netclient on OpenWrt) so you have an active VPN network to connect to
When to use this method
Use the config file method when you want to connect a device without installing the Netclient agent -- for example, a personal laptop, a phone, or a server where you prefer not to run extra daemons. The trade-off is that the config is static: if the network changes (new nodes, new keys), you need to download and re-import a fresh config file. For devices that should stay permanently connected and auto-update, use Netclient instead.
Used Versions
| Software | Version |
|---|---|
| Netmaker | v1.5.0 (Community Edition) |
| WireGuard | Any recent version |
Step-by-Step Implementation
1. Install WireGuard on the client device
Download and install the official WireGuard client from https://www.wireguard.com/install/.
Install the WireGuard app from Google Play or the App Store.
2. Generate a config file in Netmaker
- Open the Netmaker dashboard.
- Navigate to Nodes --> Add Devices.
- Select the Config files tab.
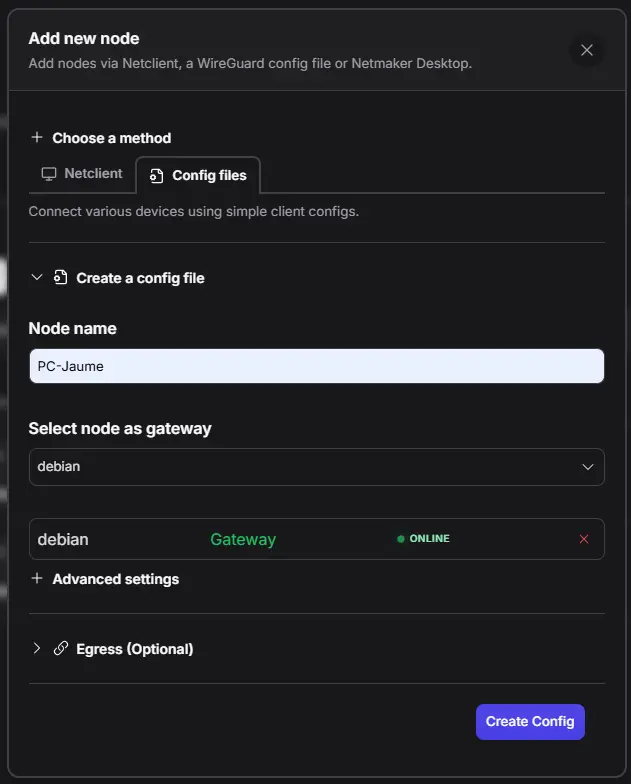
- Give the node a name (e.g.,
jaime-laptop). - Select the VPS as gateway.
- Click Create to generate the configuration.
- Download the
.conffile.
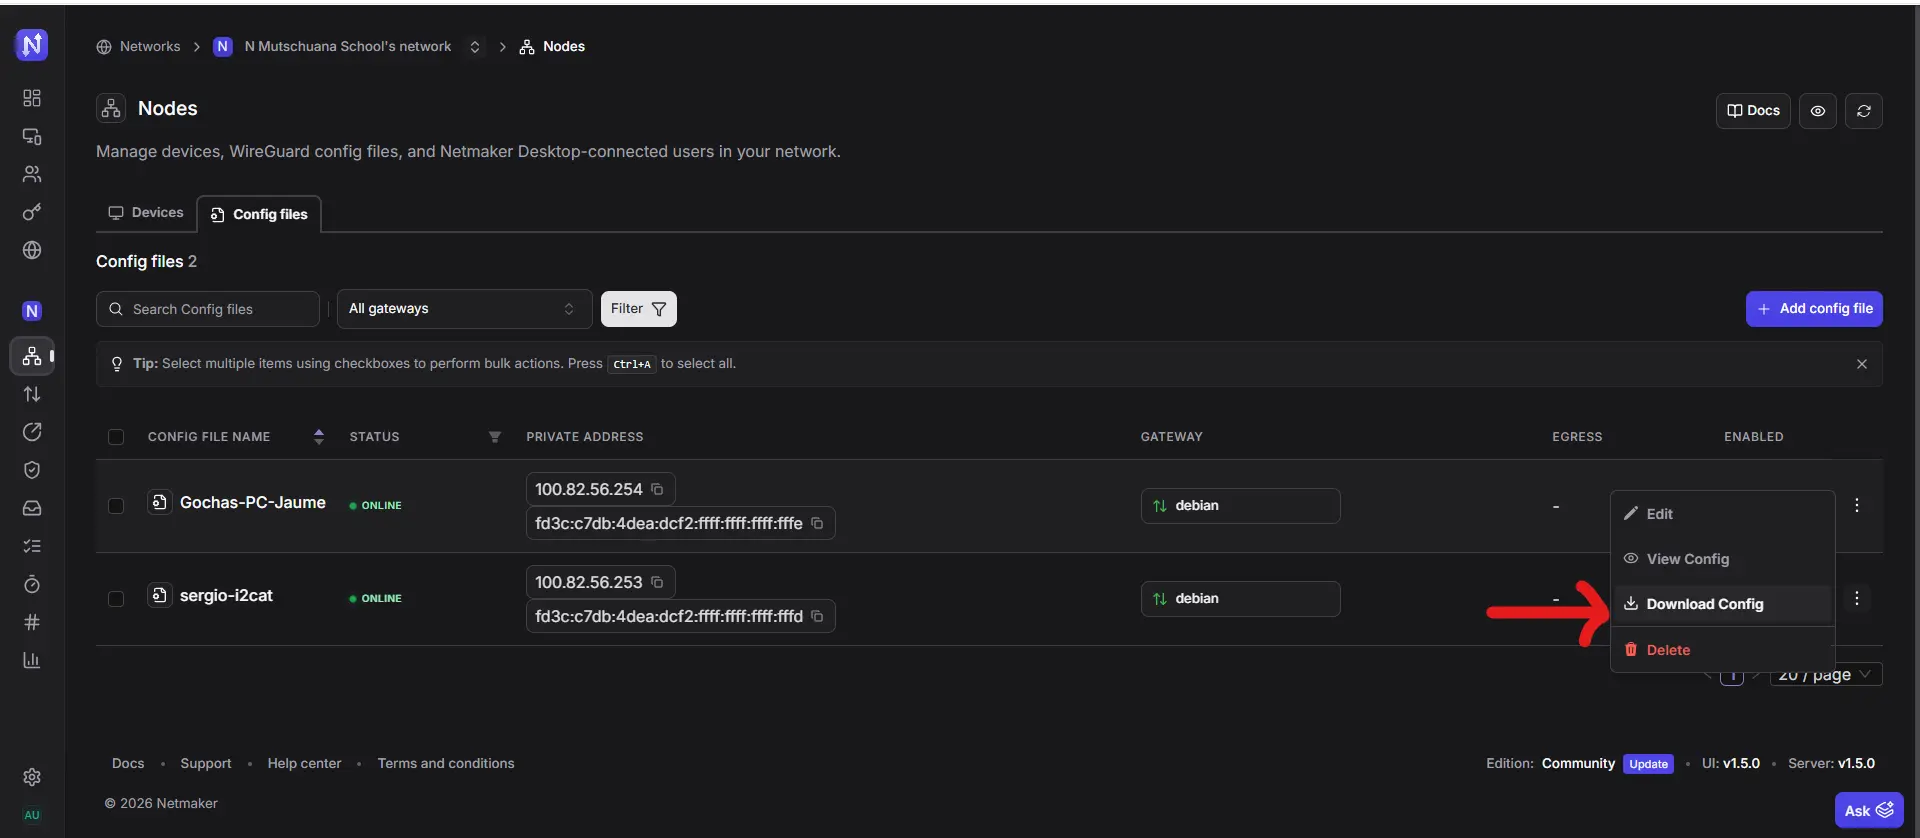
Save the config securely
The .conf file contains private keys. Treat it like a password -- do not share it or commit it to a repository.
3. Import the config on your device
-
Copy the downloaded file to the WireGuard config directory:
-
Start the tunnel:
-
To enable the tunnel on boot:
- Open the WireGuard application.
- Click Import tunnel(s) from file.
- Select the downloaded
.conffile. - Click Activate to connect.
- Open the WireGuard application.
- Click Import tunnel(s) from file (or drag the
.conffile onto the window). - Toggle the tunnel on.
- Open the WireGuard app.
- Tap + and choose Import from file or archive.
- Select the
.conffile (or scan a QR code if your Netmaker version supports it). - Toggle the tunnel on.
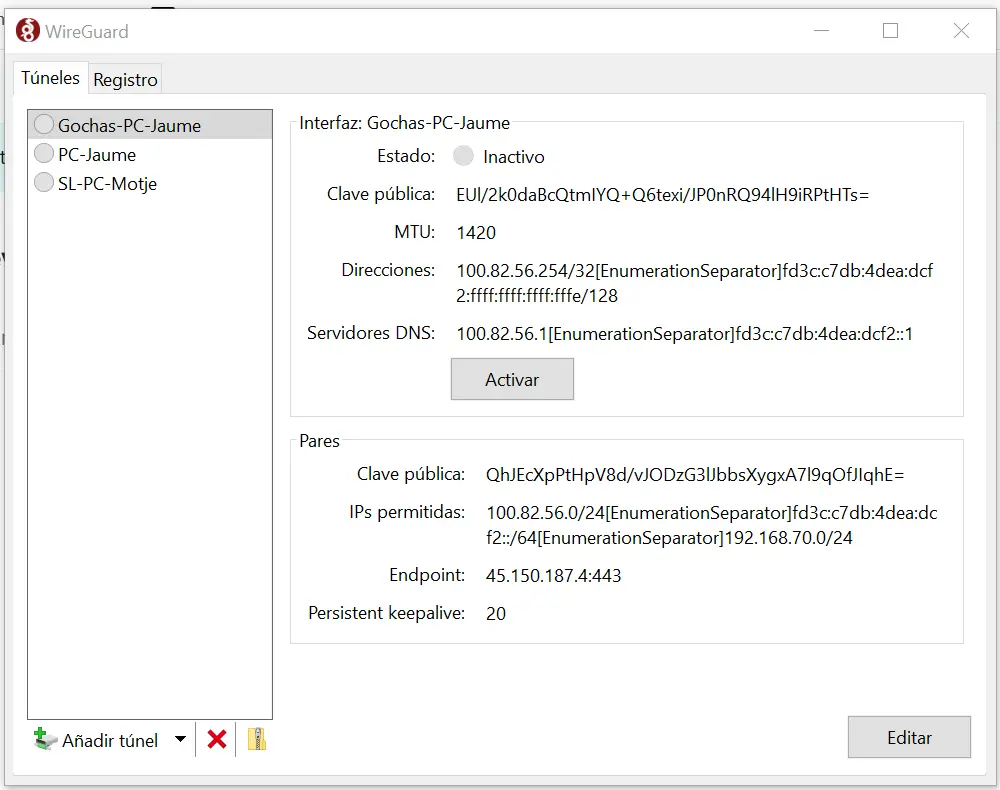
4. Verify the connection
-
Check the tunnel is active:
You should see the interface with a peer entry, a recent handshake timestamp, and data transfer counters.
-
Ping another node on the VPN to confirm connectivity:
No handshake?
If wg show does not display a recent handshake, check that:
- The client device can reach the internet (the tunnel needs outbound UDP).
- Your firewall allows outbound traffic on port 51821 (or the port configured in Netmaker).
- The config file has not expired -- generate a fresh one from the dashboard if needed.
References
- WireGuard official installation guide -- https://www.wireguard.com/install/
Revision History
| Date | Version | Changes | Author | Contributors |
|---|---|---|---|---|
| 2026-03-31 | 1.0 | Initial guide creation | Jaime Motje | Maria Jover, Sergio Gimenez |