Set Up Telegram Notifications in Zabbix
This guide covers how to configure Zabbix to send alert notifications through a Telegram bot, so you receive instant messages when a monitored host or service has a problem.
This guide implements the concept introduced in Chapter 2 — Monitoring.
What You'll Learn
- How to create a Telegram bot and obtain its API token
- How to find your Telegram chat ID (personal or group)
- How to configure the Telegram media type in Zabbix
- How to assign Telegram as a notification channel for a Zabbix user
- How to create trigger actions that send alerts on problems and recoveries
- How to customize message templates
Prerequisites
- A running Zabbix server (7.0 LTS or later) with admin access to the web interface
- A Telegram account
- At least one monitored host already configured in Zabbix (see Add Hosts to Zabbix)
Used Versions
| Software | Version |
|---|---|
| Zabbix Server | 7.4 |
Step-by-Step Implementation
1. Create a Telegram bot with BotFather
- Open Telegram and search for @BotFather.
-
Start a conversation and send the command:
-
Follow the prompts:
- Enter a display name for your bot (e.g.,
Zabbix Alerts). - Enter a username for your bot (must end in
bot, e.g.,mynetwork_zabbix_bot).
- Enter a display name for your bot (e.g.,
- BotFather replies with your bot's API token. Copy and save it — you will need it in Step 3.
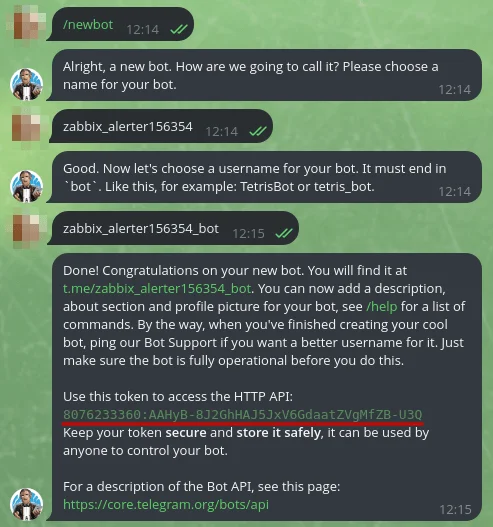
Keep your token secret
Anyone with the bot token can send messages as your bot. Do not share it publicly or commit it to version control.
2. Get your Telegram chat ID
You need the chat ID of the user or group that should receive notifications.
For a personal chat ID:
- Open Telegram and search for @myidbot.
-
Start a conversation and send:
-
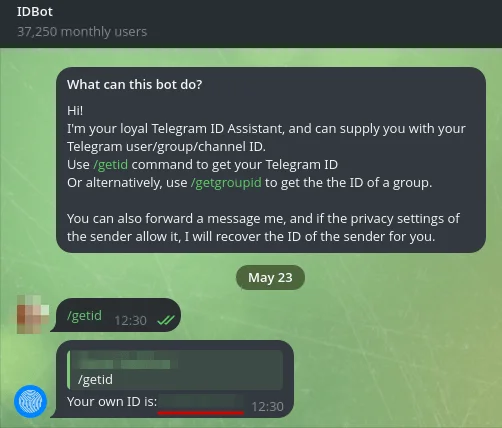
The bot replies with your numeric chat ID. Copy it.
-
Open a conversation with your own bot (the one you created in Step 1) and send:
Why send /start to your bot?
Telegram bots cannot initiate conversations. You must send /start first so the bot has permission to send messages back to you. Without this step, Zabbix notifications to your personal chat will fail silently.
For a group chat ID:
- Create a Telegram group (or use an existing one).
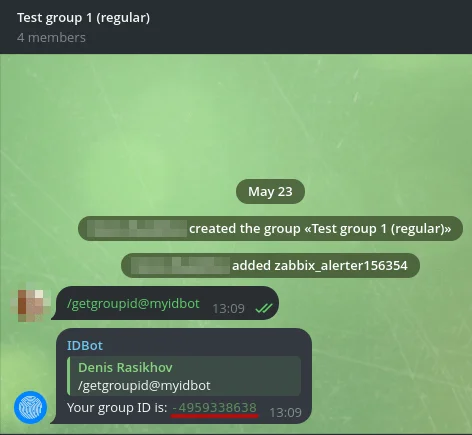
- Add both @myidbot and your newly created bot to the group.
-
In the group, send:
-
The bot replies with the group's numeric chat ID (it will be a negative number). Copy it.
-
Also send the following in the group so your bot can post messages:
Personal vs. group notifications
A personal chat ID sends alerts only to you. A group chat ID sends alerts to everyone in the group, which is useful when multiple people manage the network. You can configure different Zabbix users with different chat IDs.
3. Configure the Telegram media type in Zabbix
Zabbix ships with a pre-configured Telegram webhook media type. You just need to add your bot token.
- Log in to the Zabbix web interface.
- Navigate to Alerts → Media types.
- Find Telegram in the list and click on it to edit.
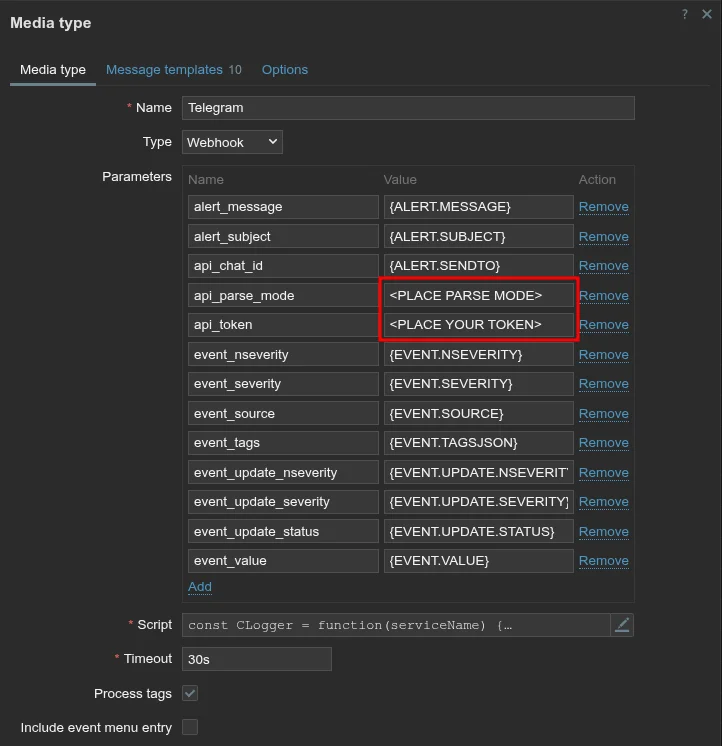
- In the Parameters section, set the following:
api_token: paste your bot API token from Step 1.api_parse_mode: enterHTML.
- Ensure the media type is Enabled.
- Click Update to save.
Test the media type
Click the Test button at the right of the Telegram media type configuration. Zabbix opens a form pre-filled with all the webhook parameters. Because there is no real event, macro values like {ALERT.SENDTO} are not resolved automatically — you must enter test values manually.
Fill in the following fields (leave any field not listed at its default value):
| Field | Value |
|---|---|
alert_message |
Test alert message |
alert_subject |
Test subject |
api_chat_id |
Your numeric chat ID (e.g. 123456789) |
api_parse_mode |
HTML (leave as-is) |
api_token |
(leave as-is — already filled from the configuration) |
event_nseverity |
3 |
event_severity |
Warning |
event_source |
0 |
event_tags |
[] |
event_update_nseverity |
0 |
event_update_severity |
0 |
event_update_status |
0 |
event_value |
1 |
The critical field is api_chat_id — it defaults to {ALERT.SENDTO}, which is not resolved during a manual test. Replace it with the actual numeric chat ID you obtained in Step 2.
Click Test. A successful response looks like {"ok":true,"result":{...}} and you should receive a message from the bot in Telegram. If the test fails, double-check the token, verify the chat ID is correct, and ensure the bot was added to the group (for group chat IDs).
4. Add Telegram as a notification channel for a user
- Navigate to Users → Users.
- Click on the user that should receive Telegram notifications (e.g., Admin).
- Go to the Media tab.
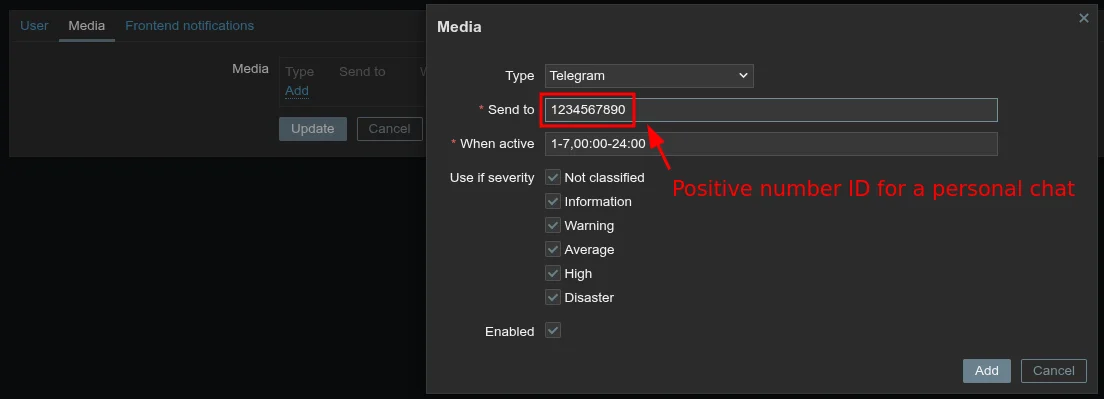
- Click Add and fill in:
- Type:
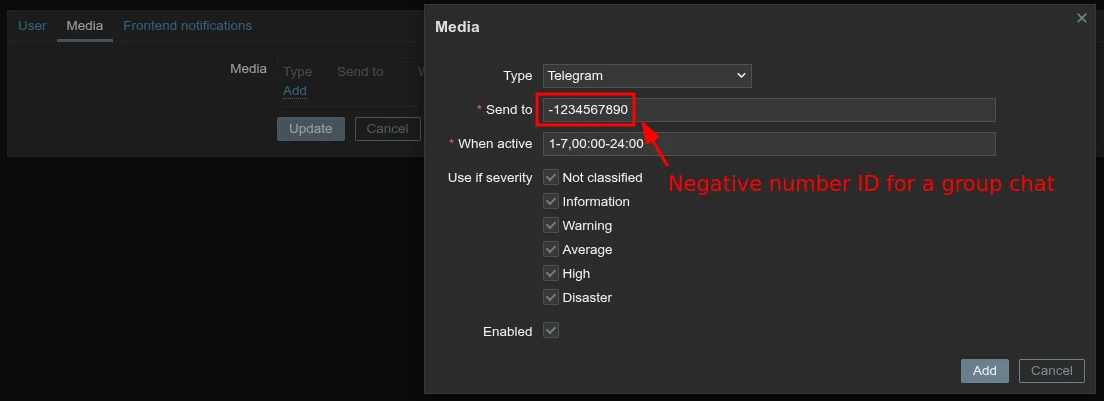
Telegram - Send to: paste the chat ID from Step 2
- When active: leave as
1-7,00:00-24:00for 24/7 notifications (or adjust to your schedule) - Use if severity: check the severity levels you want to receive (at minimum:
Warning,Average,High,Disaster)
- Type:
- Click Add to confirm the media entry.
- Click Update to save the user.
Personal vs. group chat IDs
Personal chat IDs are positive numbers (e.g., 1234567890). Group chat IDs are negative numbers (e.g., -1234567890). Make sure to include the minus sign when entering a group chat ID.
5. Enable trigger action for problem notifications
What are trigger actions?
Trigger actions tell Zabbix what to do when a trigger fires (a problem is detected) and when the problem is resolved.
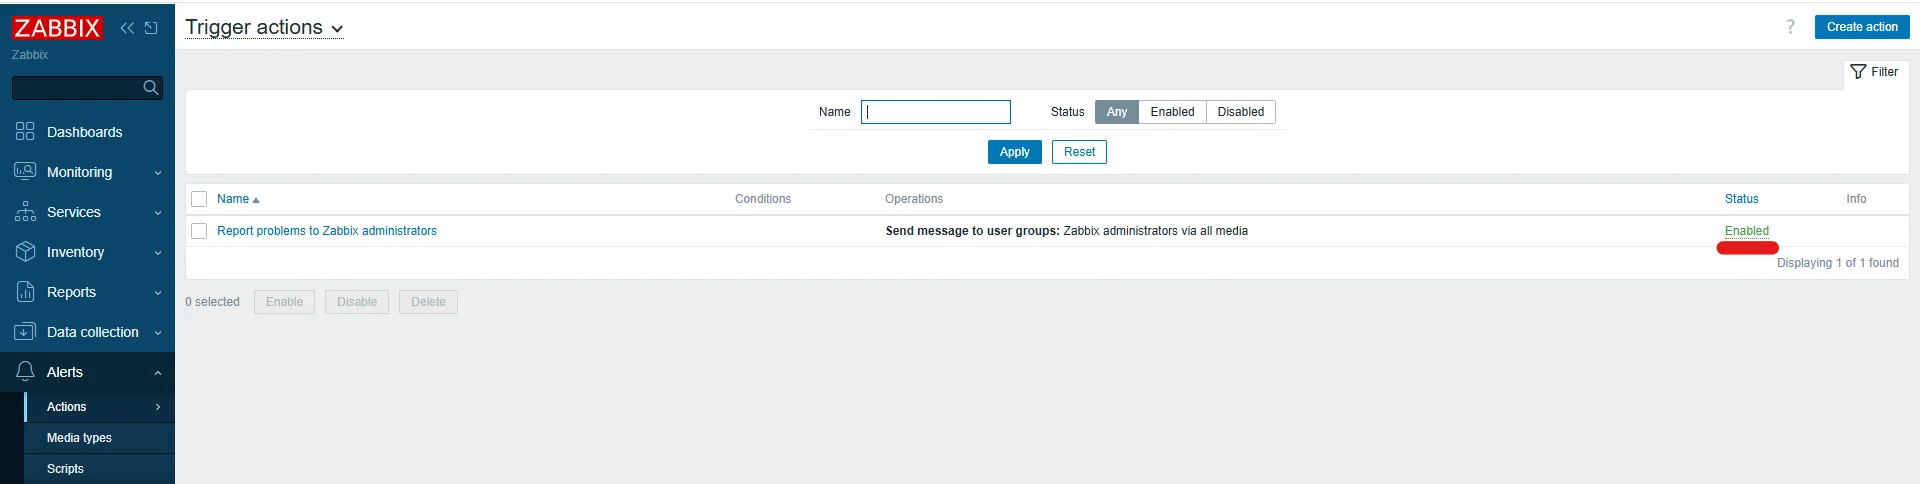
- Navigate to Alerts → Actions → Trigger actions.
- Enable the default Report problems to Zabbix administrators action.
Why recovery operations matter
Without recovery operations, you only get notified when something breaks — not when it comes back online. Configuring both ensures you know when a problem starts and when it is resolved.
6. Customize message templates
The default Telegram messages may be too verbose or lack information relevant to your network. You can customize them per media type.
- Navigate to Alerts → Media types.
- Click on Telegram.
- Scroll down to Message templates.
-
Click the Problem template to edit it and paste the following:
Subject:
Message:
-
Click the Problem recovery template to edit it and paste the following:
Subject:
Message:
-
Click Update to save.
Available macros
Zabbix provides many macros you can use in templates. Common ones include {HOST.NAME}, {TRIGGER.NAME}, {TRIGGER.SEVERITY}, {EVENT.DATE}, {EVENT.TIME}, and {HOST.CONN}. See the Zabbix documentation on macros supported by location for a full list.
Parse mode and formatting
The templates above use HTML parse mode (<b>bold</b>). Do not mix HTML tags with Markdown syntax. If a message fails to send, check that api_parse_mode is set to HTML in Step 3 and that no unescaped <, >, or & characters appear in your macro values.
References
- Zabbix Telegram integration page — https://www.zabbix.com/integrations/telegram
- Zabbix 7.0 Documentation — Media types — https://www.zabbix.com/documentation/7.0/en/manual/config/notifications/media
- Zabbix 7.0 Documentation — Trigger actions — https://www.zabbix.com/documentation/7.0/en/manual/config/notifications/action
- Zabbix 7.0 Documentation — Notification macros — https://www.zabbix.com/documentation/7.0/en/manual/appendix/macros/supported_by_location
Revision History
| Date | Version | Changes | Author | Contributors |
|---|---|---|---|---|
| 2026-04-01 | 1.0 | Initial guide creation | Jaime Motje | Joan Torres |